Investigate Situations
This topic discusses how you can use the Situations page to investigate and review anomalies that Unomaly detects. The Situations page consists of a timeline, the aggregated score, filtering options, and a list of time-ordered situations.
What is a situation?
A situation is a cluster of anomalous events and known events that happen within 60 seconds of each other. A situation begins when a system generates an event of relevance.
- If the event is an anomaly, the relevance is based on its score.
- If the event is a known, the relevance is based on its classification, which may be Notice or higher.
As relevant events are detected, they are appended to an open situation if there is one. When no events have been added for at least 1 minute, the situation ends. New relevant events will then start new situations.
How situations are scored
Situations are scored based on the type of anomaly type and the number of anomalies there are in the situation:
- System away: 10
- Never before seen: 7
- New in system: 4
- Parameter anomaly: 1
- Event stop: 7
- Event spike: 1 to 7, depending on intensity and time since the last spike.
Unomaly recalculates the score as more anomalous events get added to the situation. This means that a situation can start with a score of 1 (parameter anomaly) and grow into being a score of 9 (never before seen data, multiple events, and so on).
The unknown events are highlighted with red on the parts of the events that are anomalous. You can convert events into knowns by adding more context, classification, and descriptions to the events. See “Define knowns to highlight log events”.
Investigating with the graph and timeline
The timeline consists of two time series graphs: one depicts the total volume of data, and the other indicates the occurrence of situations.
- As you hover over individual sections of the bars you can see how many events and which frequency of events they correspond to.
- As you scroll down through the list of situations, the graph remains visible. But, you can also choose to hide it by clicking “Collapse”.
Adjusting the time span
The span of the graph can be changed longer and shorter by using the dropdown to select from presets, which include last day, last week, last month; or use the custom option to specify a specific time range.
Jumping back and forward in time
Arrows to the left and right of the graph are buttons that allow you to jump forwards and backwards in the graph with the preserved interval selection. If you are looking at last day and clicking the arrow to the left of the graph it will take you to the previous day.
Zooming in and out on selected time periods
Making selections in the graph dynamically applies a filter for the situations and events that happened in that specific time frame. When making this selection a zoom button will be presented above the graph that enables you to zoom in on that specific part of the graph.
Expanding and reviewing events in the situation
The situation list shows you the most significant anomaly in the cluster. To review the underlying events (anomalies and knowns) in the situation, click the situation to expand it and see:
- A summary of the types of anomalies in the situation with a count of how many of each type exist in the cluster.
- A filter box which you can use to run a keyword search for specific events within the situation.
- The list of the events that were clustered into the situation.
View profile details for anomalies
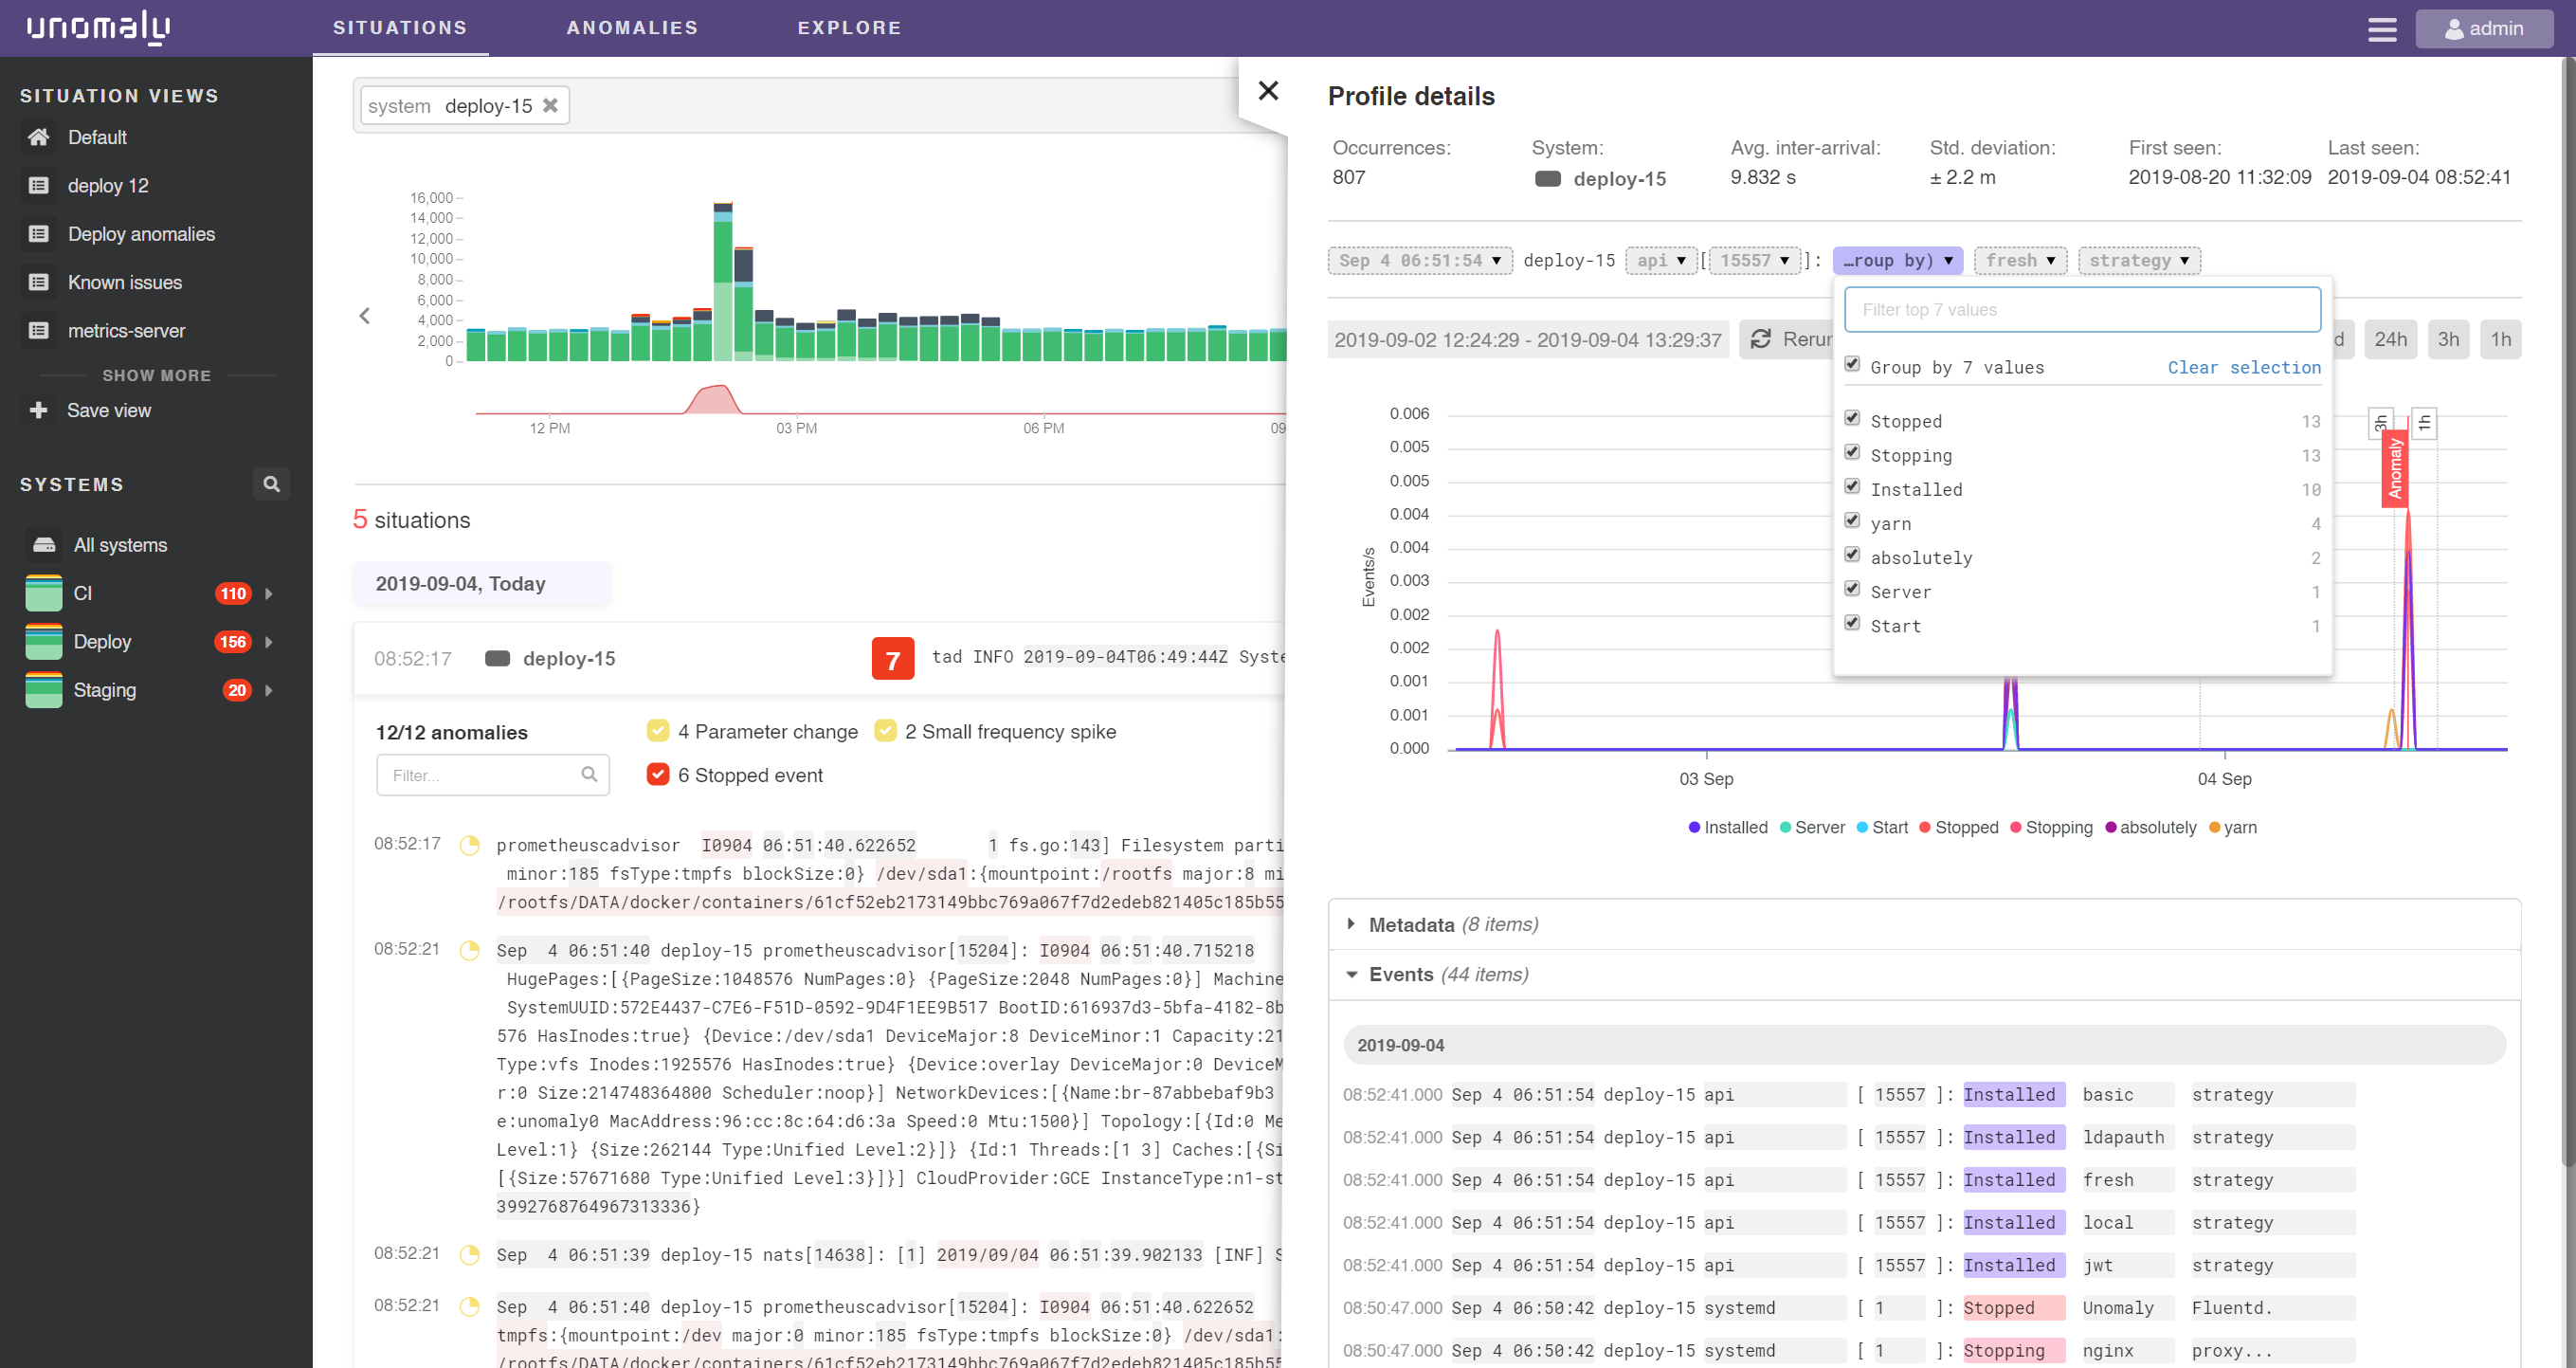
When you click an anomaly it will open a side panel to display information about the associated profile where the anomaly was triggered. On this side panel, you can query sampled events that Unomaly received, filter and group by parameter values and visualize the frequency of this profile, including a marker for when the anomaly occurred.
Filtering for anomalies within situations
You can filter in the situation to find specific events based on the type of anomaly and using keywords in the filter box.
- Click the check boxes in the summary of anomaly types to hide or show matching events in the list. For example, if you have “1 Never before seen”, “29 New parameter”, “1 Frequency spike”; You can hide the “29 New Parameter” anomalies to investigate the other two.
- Run a keyword search for specific events within the situation. For example, you might want to search the anomalies for log events that describe a “failure”.
Review surrounding events
Each situation has a Jump to events button that can help to better understand the situation's context. The button takes you to the time period in the Events page that lists the surrounding normal and anomalous events.
Event options menu
To the right of each event in the Situation is a menu with the following options:
| Event option | Description |
|---|---|
| Copy log text | Copy the full log message to your clipboard so that you can use it to search or investigate outside of Unomaly. |
| Copy link | Copy a dedicated link to the event to you clipboard that you can share. |
| Add known... | Open the knowns creation window. |
| System profile... | Open the system profile and settings window. |
Closing alerts in situations
If the situation caused an alert, a red exclamation mark displays to the right of the situation in the Situations view. To close the alert, expend the situation and click Close alert. You may also select “Close all open alerts” from the Actions menu under the timeline. See“Configure actions and notifications”.
Star a situation to review later
You can “Star” a situation to save it and review it later. All starred situations are saved in a default view, named “Starred”.
Collaborating in Situations
Inspecting a situation sometimes requires outside help, and you may want to discuss and share the situation with others.
Use comments to start a discussion
You can use the comment field to start a discussion about the situation and mention other users with the “@” character and their user name. Mentioned users will receive a mail notification that someone has mentioned them. The email contains the last comment that was made, together with the actual situation and a link to that specific situation. Clicking on the link “open in gui” takes the user directly to the situation where the discussion can continue.
Share a situation
Send a summary of situation in an email to other users with the Share button. The email will include full details about the situation and all related events, a direct link to the situation in Unomaly, and your message about the situations of interest. You can also share by copying a dedicated link to the anomaly in your clipboard.
Users can access and manage their share history from their account menu. The Share History page lists all the situations and anomalies that you have shared, who has viewed it, and where you sent it to.